Help Center · Stage Plot Generator
Getting started
Set the stage size, drop the band on, number the channels and export a PDF — then learn the screen, the metre grid and the keys.
On this page
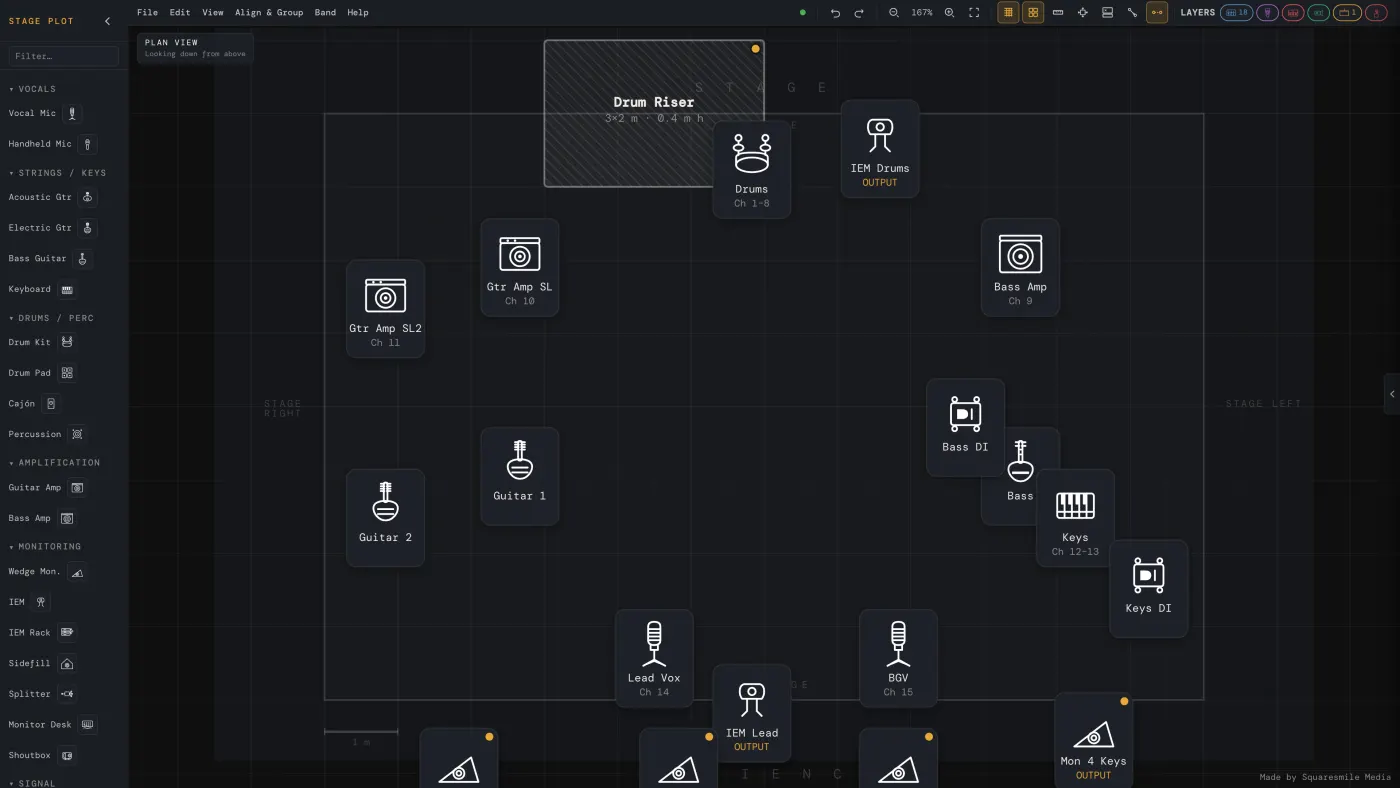
Set the real stage dimensions first; everything you place afterwards is in metres.
Quick start
- Open Stage Plot Generator from the dashboard.
- File → Templates and pick the closest starting point — for example 4-Piece Band. Templates carry a stage size, a channel plan in patch order and personnel rows, so the lists are usable at once.
- Band → Stage settings: enter the real Stage width (m) and Stage depth (m), choose the venue type and load-in side, and set Stage left = performer's or audience's view. Save it as a venue profile if you will play here again.
- Add what is missing from the palette on the left: click an item to drop it at the centre, or drag it onto the canvas. Use the search field to find anything by name.
- Click an element to open the Properties panel. Give it a label, a channel number and a provider (band / venue / shared). Press Ctrl+Enter to apply.
- File → Export → Export PDF. Tick what to include and press Export.
The screen
- Menu bar — File, Edit, View, Align & Group, Band, Help — plus toolbar buttons for undo/redo, zoom, grid, snap, connections, measure and the input list.
- Palette (left) — element categories from vocals and drums to lighting, video, power, FX and architecture, plus your own custom elements and saved group templates.
- Canvas (centre) — the stage, drawn as a rectangle at the size you entered, on a metre grid. A badge shows whether you are in Plan view or the front (elevation) view.
- Properties (right) — label, channel, channel count and sub-labels, provider, colour tint, layer, size, display mode, rotation, lock, and whether the element goes into the rider PDF.
- Input list — slides in from the right; see Build the input list.
The metre grid
One grid square is one metre, with half-metre minor lines, at every stage size. Grid and snap are on by default; G toggles the grid, View → Snap to grid toggles snapping. The measure tool reports the distance between two points you click. A room width, length and ceiling height in Stage settings draws the venue envelope, and View → Reposition stage in venue room lets you drag the stage to where it sits in it.
Keys
| Key | Action |
|---|---|
| Ctrl+Z / Ctrl+Y | Undo / redo (last 20 steps) |
| Ctrl+S | Save |
| Ctrl+0, Ctrl++ / − | Fit to screen, zoom |
| Ctrl+D, Ctrl+C / V, Delete | Duplicate, copy / paste, delete |
| Ctrl+A, Shift+click | Select all, add to selection |
| Ctrl+G / Ctrl+Shift+G, F2 | Group / ungroup, rename group |
| Ctrl+[ / ] | Send back / bring front |
| R, Shift+R, Alt+R | Rotate +90°, +15°, −90° |
| Arrow keys | Move selection (a grid step when snap is on, else 1 px) |
| Space+drag, mouse wheel | Pan, zoom |
| G | Grid on / off |
| Double-click | Edit a label inline |
Help → Keyboard shortcuts shows the full table in the app. On a Mac, Ctrl is ⌘.
Saving
The plot autosaves every minute and reopens where you left it. File → Save slots manager keeps named snapshots. Plots, slots, venue profiles, group templates and custom elements sync with your account, so the plot you built on the laptop opens on the tablet. See Account sync.
Thanks for the feedback.